Hi Tom,
Yes so domain validation requires either HTTP validation (via TCP port 80) or DNS validation (by updating an _acme-challenge record in your domains DNS.
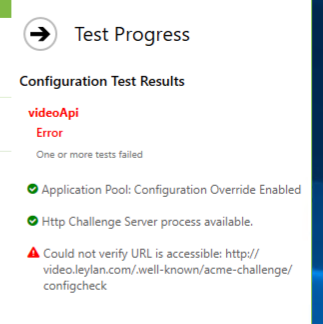
Even if you don’t have an http listener on port 80, if you are running Certify The Web on that machine then Certify can answer for you as long as nothing else is consuming port 80 (it knows how to share with IIS but other service types like node etc don’t allow that). By default Certify will start up a temporary http challenge listener (this can be enabled/disabled under the app Settings section) during validation. If you have been using this and it’s stopped working then that sometimes means a reboot would be helpful.
So to be clear, you do not strictly need IIS or other http port 80 listener to complete http validation using Certify. IIS is used as a fallback if present.
Beyond that, http validation can also be completed by specifying the web root for files so that your server (whatever it is) can serve the http challenge response files form the ./well-known/acme-challenge/ path. This sometimes need special configuration on your web server to allow the file to be served (as an extension-less text file).
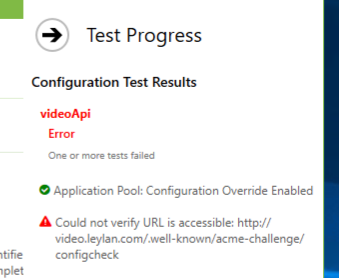
The configcheck file that we use in the Test is something our challenge response service offers by default (and we write out to disk if using a web server instead). It provides a basic diagnostic (extensionless) text file with a known name for easy testing to confirm the challenge response path is reachable externally.
For DNS validation, you are using Cloudflare for your domains DNS and this is also pretty easy to setup. The API token method is the easiest and you can restrict it’s scope to a single domain etc: Cloudflare DNS | Certify The Web Docs - once setup the app can update the _acme-challenge.video TXT record for you in your DNS and you don’t have to do anything else for future renewals.
If you are testing to figure out validation and want to avoid rate limits you can add a Let’s Encrypt Staging account under Settings > Certificate Authorities> Add Account (set Staging on the Advanced tab). Then on the managed certificate itself set Certificate > Advanced > Certificate Authority to Let’s Encrypt and check “Use Staging Mode”. This will use the test Let’s Encrypt system and the certificates issued will not be publicly trusted, you can then set it back to Auto when you have validation sorted out and use Request Certificate to get a valid cert again.
Note also that the app supports many different other free Certificate Authorities (ZeroSSL, Google Trust, BuyPass etc), so if you ever get stuck with rate limits it’s easy to change CA - you add a CA account as above then select that CA as your preferred CA in the certificate settings. If trying out different CAs I also recommend selecting Advanced > Actions > Reset Failure Status to prevent the app attempting CA Failover as failover that can be a bit confusing if you are experimented with CA settings and the cert has already failed multiple times.
As you are using Express JS you will then also need to have a Deployment Task under Tasks to Export the resulting certificate file in the format you require (usually the full chain pem file and a private key file), you perhaps have this setup already. You can also use a Stop/Start/Restart task to restart your ExpressJS app if required (or you can periodically check in your nodejs app for updated certs).


